Guide for Installation of Tailwind CSS
A Simple way to install Tailwind CSS to your Project.
Posted on: 16 Jan 2024

Introduction
If you're ready to elevate your web development game with a sleek and customizable styling framework, you've come to the right place. In this step-by-step tutorial, I'll walk you through the seamless installation process of Tailwind CSS, empowering you to create stunning, responsive designs for your websites. Let's dive in and unlock the potential of Tailwind CSS together!
Basic Necessities
To Install Tailwind CSS to your project. You must pre install VS-code, Nodejs softwares.
Step-1:
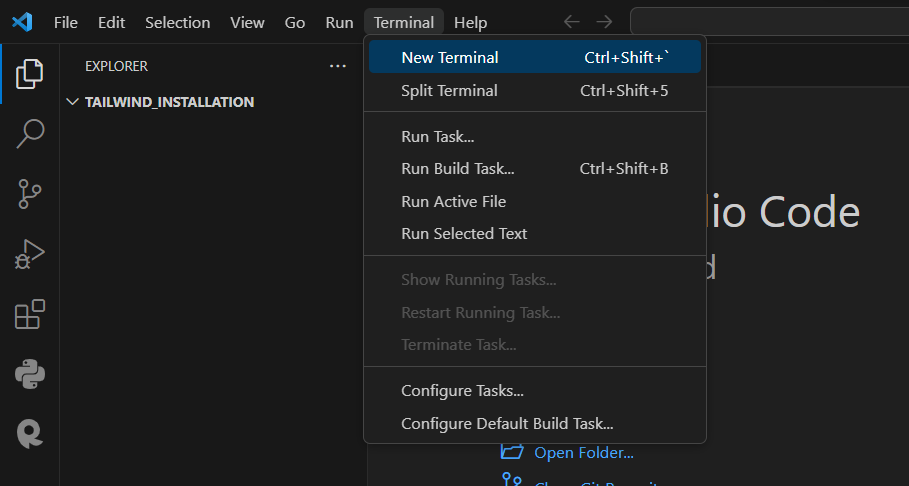
Go to VS-code and go to: Terminal > New Terminal OR Shortcut key : ctrl + shift + `.
.
Step-2:
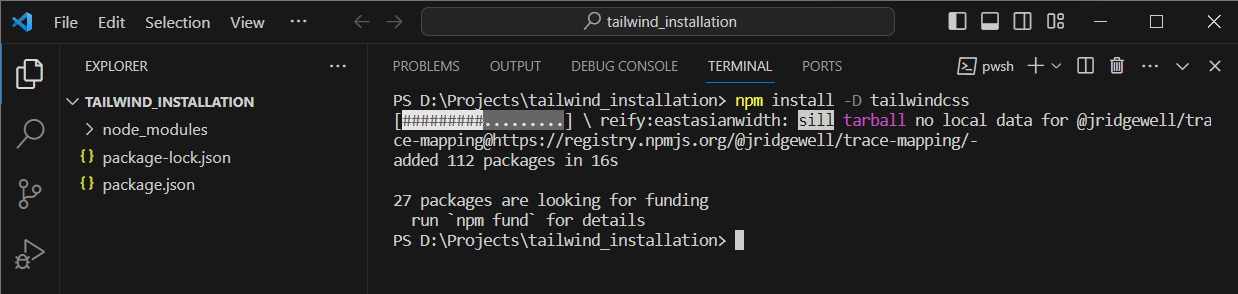
In the terminal type this ➡️ npm install -D tailwindcss, this will create a node_module folder, package.json & package-lock.json files.
Note:
npm install -D tailwindcss Install tailwindcss via npm, and create your tailwind.config.js file.
npm install -D tailwindcss
Step-3:
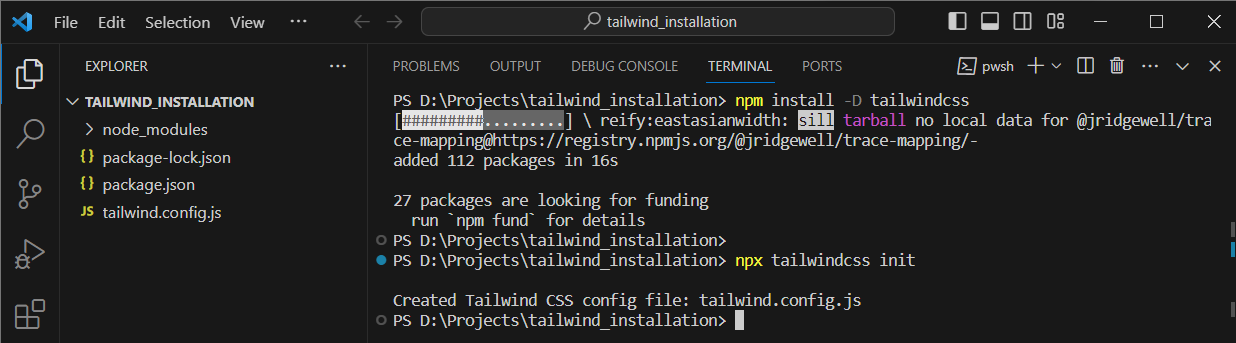
For initialization execute this npx tailwindcss init in terminal. This will create tailwind.config.js.
npx tailwindcss init
Step-4:
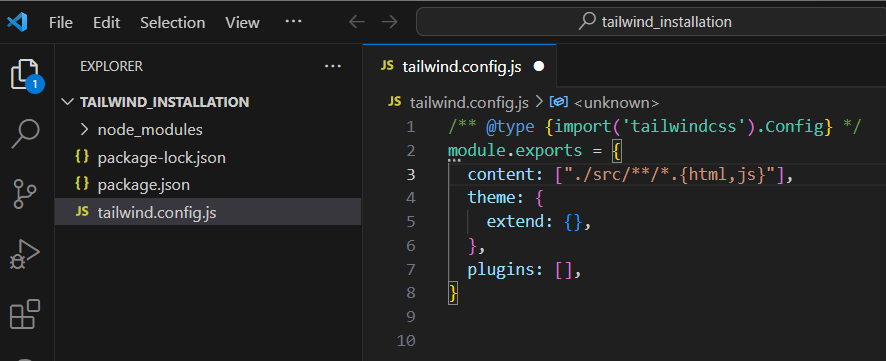
Go to tailwind.config.js and make changes as shown in below Image.
"./src/**/*.{html,js}"
Step-5:
create a folder names src and in that create a input.css, index.html file where all the tailwind css directive, index.html will be stored. And here you can create your custom class.
Step-6:
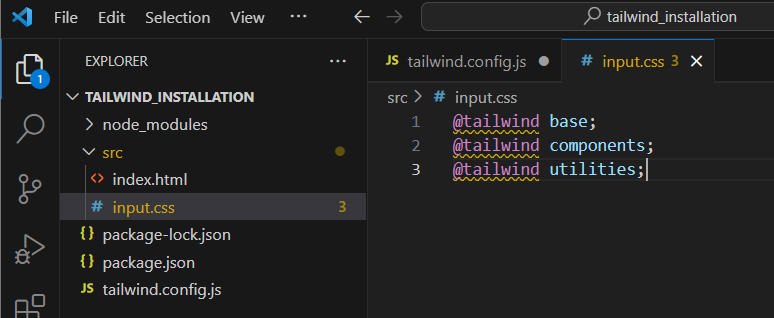
Fill the input.css file as shown below.
@tailwind base;
@tailwind components;
@tailwind utilities;
Step-7:
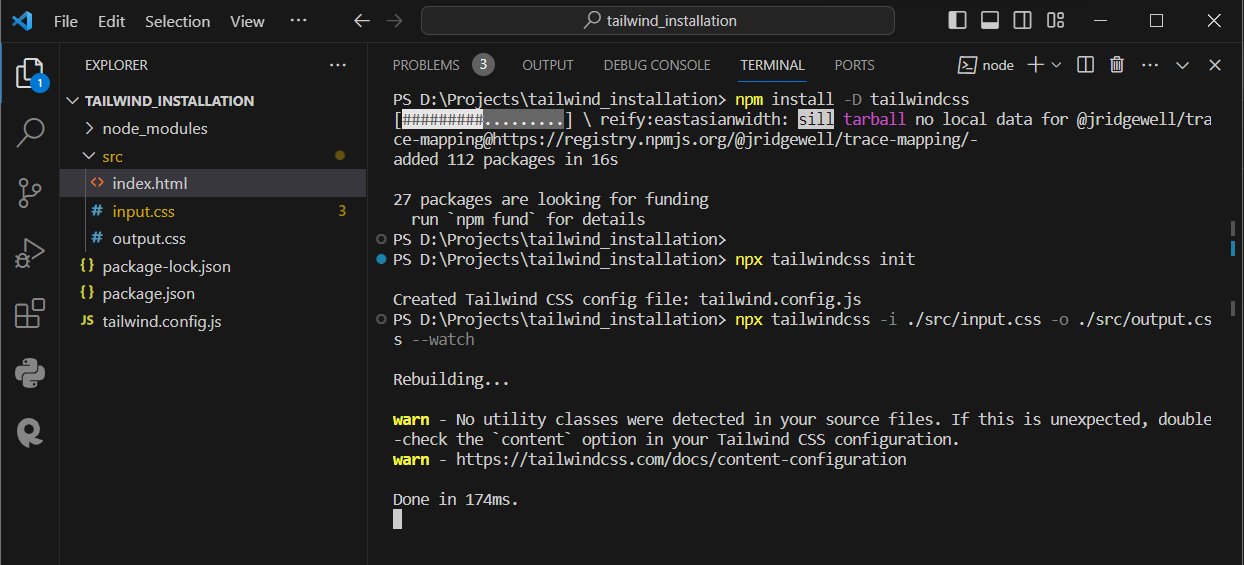
Now in the terminal execute run this : npx tailwindcss -i ./src/input.css -o ./src/output.css --watch here --watch is necessary because when you open your project later, every time you have to run this code to apply new changes of tailwind css. To this simple please refer next step.
Note:
This command uses npx to run Tailwind CSS, instructing it to process the ./src/input.css file, generate the output in ./src/style.css, and continuously watch for changes (--watch). It's a way to dynamically apply Tailwind CSS styles to your project during development. Here -i refers to "input" and -o refers to "output"
npx tailwindcss -i ./src/input.css -o ./src/output.css --watch
Step-8:
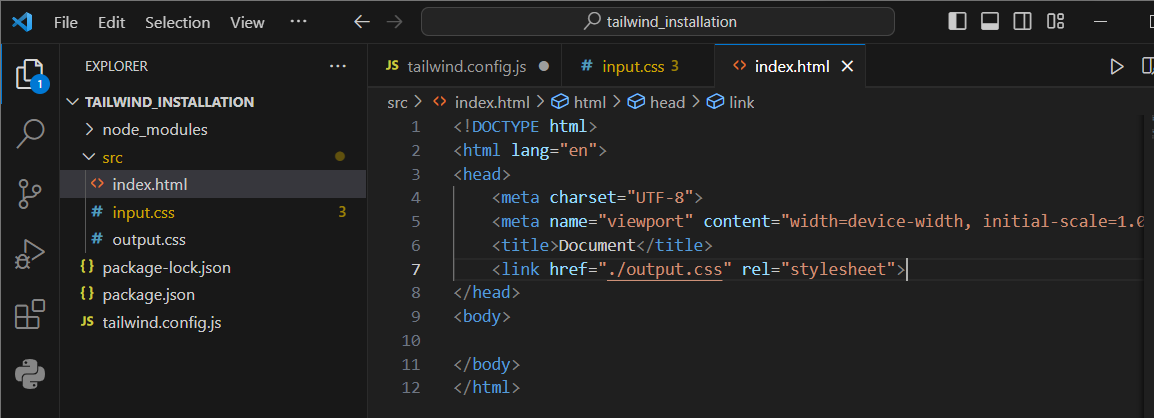
Now last step is to link tailwind css to html.
Conclusion
Congratulations! You've successfully navigated through the installation process of Tailwind CSS. Now armed with this powerful styling framework, you're well on your way to crafting visually appealing and responsive web designs effortlessly. As you continue your journey with Tailwind, don't forget to explore its extensive documentation and leverage its utility-first approach to streamline your workflow. With Tailwind CSS at your disposal, the possibilities for creating modern, eye-catching interfaces are endless Happy coding!